
First steps
Getting to know a new mobile device can be pretty exciting, especially if this is your first smartphone or tablet. The key is to start with the basics and take it one step at a time so you don't get overwhelmed.
First, make sure you're comfortable with the interface, including the screen, some of the built-in apps, and the various gestures you'll use to get around. Then you can move on to some other fundamental tasks, like connecting to the Internet using Wi-Fi.
Google account
The first time you turn on your device, you'll be asked to set up a few different things, including your preferred language, the date and time, and (most importantly) your Google account. If you don't have a Google account yet, you can create one during the setup process.
There are a few reasons this step is so important. In short, your Google account is your identity on your device. Not only does it connect you to the cloud—where things like photos and contacts are stored—but it also gives you access to the Play Store, where you can download and purchase apps. The more you use your device, the more you'll see how integrated your Google account really is.
You may have a Google account already if you use any other Google services, like Gmail, Chrome, Google Drive, or even YouTube. For more information, check out our Google Account tutorial.
Getting to know your device
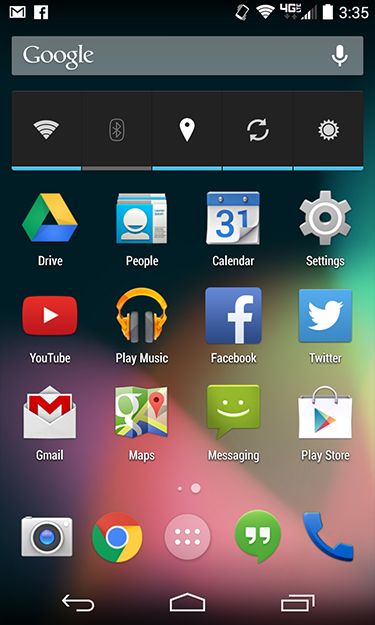
Once your device is set up, you should be taken to a simple screen with some icons, buttons, and other miscellaneous features. This is actually one of the most important parts of your device—it's called the Home screen—and it's where you'll store all your favorite apps.
Remember, every Android device is unique. This means your experience may vary depending on your phone or tablet. Luckily, you can still learn a lot by comparing your device to ours.
Click the buttons in the interactive to learn more about the interface, including the Home screen and other features.
Basic apps
Ready to get started with some everyday tasks, like email and text messaging? We'll discuss these things in detail over the next few lessons, but in the meantime you can check your device for these basic built-in apps. They may go by slightly different names depending on your phone or tablet, but the icons will usually give you some clue.
- Phone for making phone calls
- Messaging for text messaging, or Hangouts for text messaging plus Google chat
- Email for managing your email, or Gmail if you have a Gmail account
- People for your contacts list (may also be called Contacts)
- Chrome for browsing the Web (may also be called Internet or Browser)
- Camera for taking photos and videos
- Play Store for downloading apps
- Settings for adjusting your settings
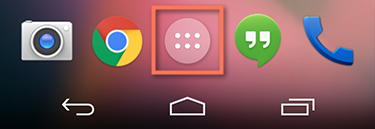
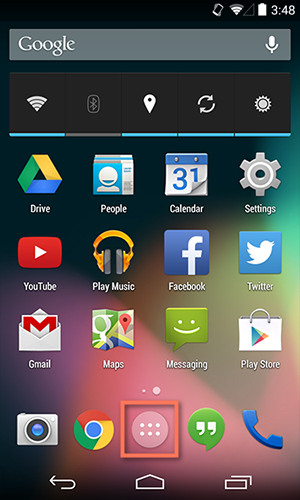
Some of these apps may be on your Home screen already. If they aren't, take a look in your Apps view. This special view gives you access to every app on your device. To open it, look for the icon near the bottom of the Homescreen.
Basic gestures
Gestures are what you'll use to interact with your device's touchscreen. For instance, instead of clicking something with your mouse, you'll tap the screen with your finger. We'll refer to gestures throughout this tutorial, so make sure you're familiar with the examples below.
- Tap to "click", select, or open something on your device, like a button or an app
- Tap and hold to occasionally access other options (think of this as "right-clicking")
- Drag to scroll up and down, left and right, or any other direction on the screen
- Swipe left or right to "flip through" things, like pages on the Home screen, photos, or pages in an e-book
- Double-tap to zoom in or out in certain apps, like Maps or Chrome
- Pinch (i.e., open or close your thumb and forefinger) to zoom in or out almost anywhere
Accessing the Internet
Your device can connect to the Internet almost anywhere, either though mobile data (3G/4G or LTE) or nearby Wi-Fi. So what exactly is the difference? Most data plans only give you a certain amount of data per month, and there can be repercussions if you go over your limit. With Wi-Fi, you can use the Internet as much as you want, and it won't count against your data.
To connect to Wi-Fi (optional):
Do you have access to a nearby Wi-Fi network (for example, at home or at work)? You can easily connect to it using the steps below. For networks that you access repeatedly, you generally only have to do this once. The next time you're in range, you'll be connected to the network automatically, as long as you leave the Wi-Fi feature turned on.
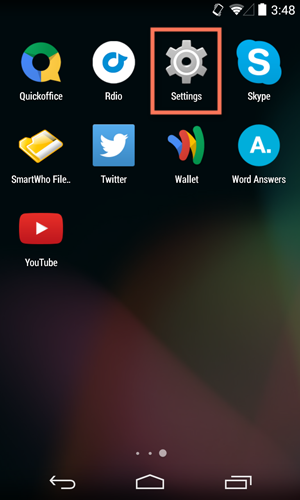
- Make sure you're on the Home screen, then open the Apps view. Your icon may look different from ours, but it's usually found in the Favorites tray near the bottom of the screen.
- Tap the Settings icon. You may need to swipe through a few screens to find it.
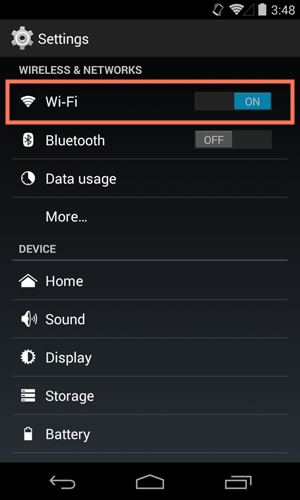
- Scroll through the list of settings until you find the Wi-Fi feature. If it isn't already set to ON, tap the control on the right.
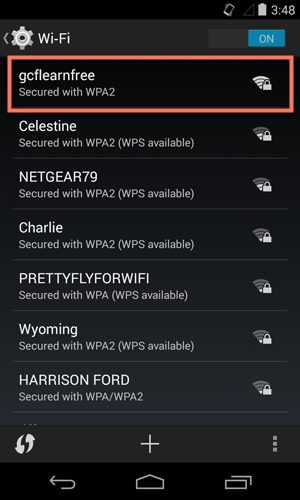
- When you're done, tap the word Wi-Fi. This will open a list of nearby networks.
- To join a network, just tap the one you want. If the network is secured, you'll need to enter a password to connect to it.
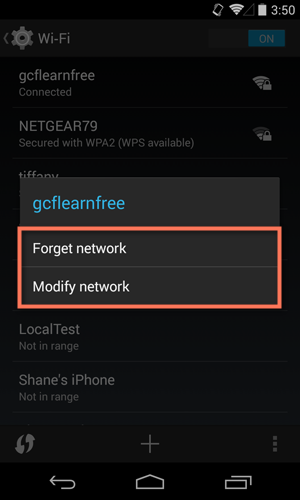
- When you're done, your device will remember the details of the network (including the password if applicable), so you can connect to it automatically in the future. If you ever want to change these settings, tap and hold the network name, then choose Forget or Modify.
If the network you're connecting to is unsecured, you can access it without a password, but you should think carefully before you do (especially if it's a public hotspot, like Wi-Fi at your local coffee shop). Anything you view or share over an unsecured network is not necessarily safe from prying eyes.
Keyboard tips
By now, you've probably already encountered the keyboard on your device. It's designed to pop up automatically whenever you need to type something; for example, when you're composing an email, searching the Web, or filling out a form.
This keyboard may be smaller than a traditional keyboard, but it comes with several convenient shortcuts to make typing easier. Take the example below. Things like symbols, numbers, and capital letters are actually easy to access—you just have to know where to look.
Click the buttons in the interactive below to learn more about using your device's keyboard.


This is really helpful and comprehensive! Great read!
ReplyDelete